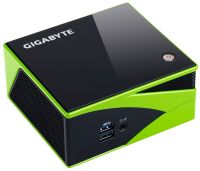
The ESXi 6.0 base image provided by VMware does not work with Gigabyte BRIX out of the box. This post explains how to create a customized ESXi 6 ISO for your Gigabyte BRIX. These images can be used to do a fresh install or upgrade a BRIX to VMware ESXi 6.0.
The Image works for the following BRIX:
- GB-BXi3-4010: Intel Core i3-4010U (2x 1.7GHz)
- GB-BXi5-4200: Intel Core i5-4200U (2x 2.6GHz)
- GB-BXi7-4500: Intel Core i7-4500U (2x 3.0GHz)
- GB-BXi3H-4010: Intel Core i3-4010U (2x 1.7GHz)
- GB-BXi5H-4200: Intel Core i5-4200U (2x 2.6GHz)
- GB-BXi7H-4500: Intel Core i7-4500U (2x 3.0GHz)
- GB-BXi5-4570R: Intel Core i5-4570R (4x 3.20 GHz)
- GB-BXi7-4770R: Intel Core i7-4770R (4x 3.90 GHz)
Use one of the following guides to create a customized ISO
- Create ISO with PowerCLI from ESXi Offline Bundle
- Create ISO with PowerCLI from Online Depot
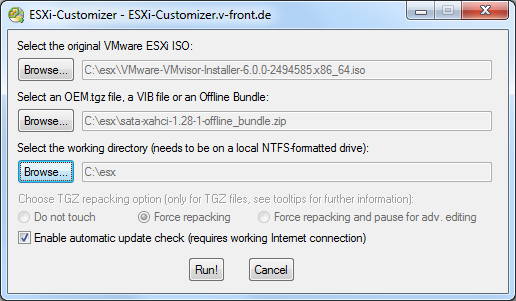
- Create ISO with ESXi-Customizer (v-front.de)
1. Create ISO with PowerCLI from ESXi Offline Bundle
- Download and install vSphere PowerCLI 6.0 to use the Image Builder. This requires an account at vmware.com. If you are not entitled to download PowerCLI, register for an evaluation.
- Download required packages (Place all files in C:\esx)
- ESXi 6.0 Offline Bundle (VMware-ESXi-6.0.0-2494585-depot.zip)
- Sata-xahci Offline Bundle (Provided by v-front.de)
- Net55-r8168 Offline Bunde (Provided by v-front.de) - Open VMware vSphere PowerCLI

- Enter the following commands
cd c:\esx\
Add-EsxSoftwareDepot c:\esx\VMware-ESXi-6.0.0-2494585-depot.zip
Add-EsxSoftwareDepot c:\esx\sata-xahci-1.28-1-offline_bundle.zip
Add-EsxSoftwareDepot c:\esx\net55-r8168-8.039.01-napi-offline_bundle.zip
New-EsxImageProfile -CloneProfile "ESXi-6.0.0-2494585-standard" -name "ESXi-6.0.0-2494585-BRIX" -Vendor "virten.net" -AcceptanceLevel "CommunitySupported"
Add-EsxSoftwarePackage -ImageProfile "ESXi-6.0.0-2494585-BRIX" -SoftwarePackage "sata-xahci"
Add-EsxSoftwarePackage -ImageProfile "ESXi-6.0.0-2494585-BRIX" -SoftwarePackage "Net55-r8168"
Export-ESXImageProfile -ImageProfile "ESXi-6.0.0-2494585-BRIX" -ExportToISO -filepath ESXi-6.0.0-2494585-BRIX.iso
Export-ESXImageProfile -ImageProfile "ESXi-6.0.0-2494585-BRIX" -ExportToBundle -filepath ESXi-6.0.0-2494585-BRIX.zip
- Use the ZIP file to upgrade ESXi or the ISO file to do a fresh install.
2. Create ISO with PowerCLI from Online Depot
- Download and install vSphere PowerCLI 6.0 to use the Image Builder. This requires an account at vmware.com. If you are not entitled to download PowerCLI, register for an evaluation.
- Open VMware vSphere PowerCLI

- Enter the following commands. The Image Profile used is currently (April 2015) the latest available. Check my Image Profiles Page to get the latest profile.
Add-EsxSoftwareDepot https://hostupdate.vmware.com/software/VUM/PRODUCTION/main/vmw-depot-index.xml
Add-EsxSoftwareDepot http://vibsdepot.v-front.de
New-EsxImageProfile -CloneProfile "ESXi-6.0.0-20150404001-standard" -name "ESXi-6.0.0-20150404001-BRIX" -Vendor "virten.net" -AcceptanceLevel "CommunitySupported"
Add-EsxSoftwarePackage -ImageProfile "ESXi-6.0.0-20150404001-BRIX" -SoftwarePackage "Net55-r8168"
Add-EsxSoftwarePackage -ImageProfile "ESXi-6.0.0-20150404001-BRIX" -SoftwarePackage "sata-xahci"
Export-ESXImageProfile -ImageProfile "ESXi-6.0.0-20150404001-BRIX" -ExportToISO -filepath ESXi-6.0.0-20150204001-BRIX.iso
Export-ESXImageProfile -ImageProfile "ESXi-6.0.0-20150404001-BRIX" -ExportToBundle -filepath ESXi-6.0.0-20150404001-BRIX.zip
- Use the ZIP file to upgrade ESXi or the ISO file to do a fresh install.
3. Create ISO with ESXi-Customizer (v-front.de)
- Download and extraxt ESXi-Customizer
- Download required packages (Place both files in C:\esx)
- ESXi 6.0 ESXi ISO image (VMware-VMvisor-Installer-6.0.0-2494585.x86_64.iso)
- Sata-xahci Offline Bundle (Provided by v-front.de)
- Net55-r8168 Offline Bunde (Provided by v-front.de) - Run ESXi-Customizer.cmd
- Select ESXi ISO and Sata-xahci package

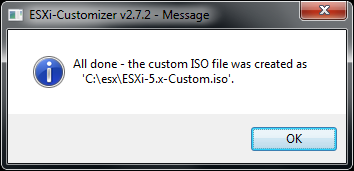
- Press Run!
- Repeat Step 3 - 5 with the created custom ISO file and the net55-r8169 package.
- Install ESXi with the ISO created by ESXi-Customizer

Thanks for this posting, the procedure works flawlessly for the GB-BXi7-4770R models and I have built two of them. Now I am looking to build a GB-BXi7-5500U and it stalls out initializing the storage stack. Any ideas ?
Steve,
I had the same issue. Make sure your SATA controller is in AHCI mode, not RAID.
Great Article! The fact that it only has 1 physical NIC means you have to be creative with the VM Networking especially if you are connecting to an ISCSI NAS. I accomplished this by creating a 2nd VMKernel and assigning a 2nd ip to it (on a different subnet) For example, your VMKernel for VM management may be 192.168.1.x and then your ISCSI VMKernel could be 192.168.2.x. Create your ISCSI software adapter and bind it to your ISCSI VMKernel. You will need a physical switch that is 802.1q compliant to configure VLAN's and tagging to segment your ISCSI traffic from your LAN traffic.
Hello Steve,
Did you manage to solve the initializing the storage stack issue on the GB-BXi&-5500U ?
Does anyone know if these instructions are still true to the newest releases of Brix? (GB-BKi7A-7500/GB-BKi5A-7200/GB-BKi3A-7100)?
Hi iam unable to install Vmaware in GB BX i7 4500 model brix.Did any one tried installing it and was successfull.
It stops at initializing IOV .I tried the below solution but didnt work .
Booting ESXi gets stuck at “Initializing iov”.
Reboot, press Shift+O in the boot-loader
Open a terminal.
Move to the end of the line
Type: noIOMMU. (Don’t delete anything, just add noIOMMU after it)
Now the install will bypass not “Initialize iov”and you will be able to install/run ESXi
Any advice please
Hi cool article on custom images has come in handy, just thought i would share quick update for any that may be interested.
I have just successfully loaded "vSphere 6.7 Build 8169922" using unmodified ISO image straight from VMware onto my GB-BSi7HT-6500 running FW F7, its working very nice no issues spotted yet.
VC deployment succeeded and all HW present, vSphere 6.7 install also 6.7 picked up the 960 EVO M.2 drive no problems.
I agree with Paul Kennard. I found that with my BRIX GB-BRi5H-8250, installing ESXi 6.5 did not require the network drivers. My system has the following network adapter:
0000:00:1f.6 Ethernet controller Network controller: Intel Corporation Ethernet Connection I219-V [vmnic0]
Class 0200: 8086:1570
One other point- the GB-BRi5H-8250 has both Wifi and network ports. Does that mean I can create 2 kernel ports on the VMware host with redundant uplings to my router?
I would love to know if it was possible to setup the WiFi as a network port in ESXi?
I used commands to install:
Add-EsxSoftwareDepot https://hostupdate.vmware.com/software/VUM/PRODUCTION/main/vmw-depot-index.xml
Add-EsxSoftwareDepot http://vibsdepot.v-front.de
New-EsxImageProfile -CloneProfile "ESXi-6.5.0-20190504001-standard" -name "ESXi-6.5.0-20190504001-BRIX" -Vendor "virten.net" -AcceptanceLevel "CommunitySupported"
Add-EsxSoftwarePackage -ImageProfile "ESXi-6.5.0-20190504001-BRIX" -SoftwarePackage "Net55-r8168"
Add-EsxSoftwarePackage -ImageProfile "ESXi-6.5.0-20190504001-BRIX" -SoftwarePackage "sata-xahci"
Export-ESXImageProfile -ImageProfile "ESXi-6.5.0-20190504001-BRIX" -ExportToISO -filepath ESXi-6.0.0-20150204001-BRIX.iso
Export-ESXImageProfile -ImageProfile "ESXi-6.5.0-20190504001-BRIX" -ExportToBundle -filepath ESXi-6.5.0-20190504001-BRIX.zip
But, receive error below when executing "Export-ESXImageProfile" to create an ISO
Pasting error since I forgot to put in previous comment:
Export-ESXImageProfile : [Errno 13] Permission denied:
'C:\\ESXi-6.0.0-20150204001-BRIX.iso'
At line:1 char:1
+ Export-ESXImageProfile -ImageProfile "ESXi-6.5.0-20190504001-BRIX" -E ...
+ ~~~~~~~~~~~~~~~~~~~~~~~~~~~~~~~~~~~~~~~~~~~~~~~~~~~~~~~~~~~~~~~~~~~~~
+ CategoryInfo : NotSpecified: (:) [Export-EsxImageProfile], Soap
Exception
+ FullyQualifiedErrorId : System.Web.Services.Protocols.SoapException,VMwa
re.ImageBuilder.Commands.ExportProfile